There are several Template Commands available. To add a new Template Command, click “+ Add Command” on the Commands tab within the Template Form section. Select the type of Command to be created from the list of available types:
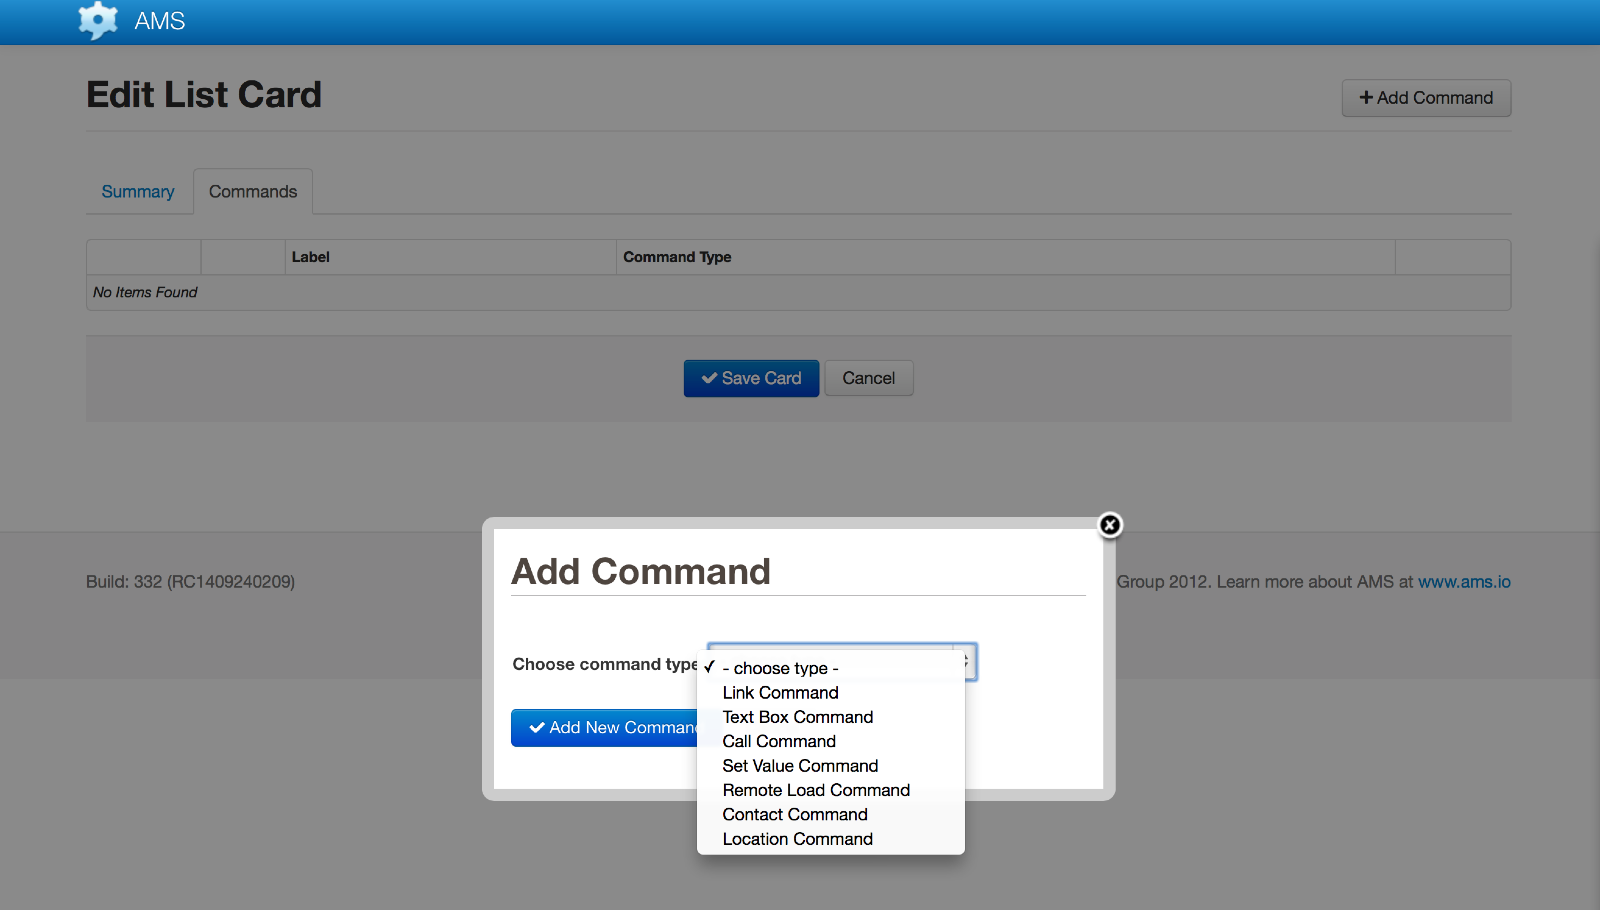
Commands will display as menu options unless the “Show As Button” option is selected.
The label property is used as either the menu text or button label.
Link Command
The Link Command is used for navigation throughout a form.
In addition to simply taking the user from one card to another, link commands can also navigate to another template or a different card or template based on a condition.
Links to different Templates
In addition to Link Commands allowing the user to move from one card to another, they can also move to a separate template. This is different to using a list card with a child template and instead takes you directly to the root card of the linked template.
Data Format
Conditional Links
As well as linking to cards or templates you can also set up multiple destinations that are only triggered if the provided condition is meet.
These conditions are simple rules that check for a value in the message and compare that with the one provided. A Link Command can have any number of conditional rules. New rules are added by clicking the “+ Add Rule” button.
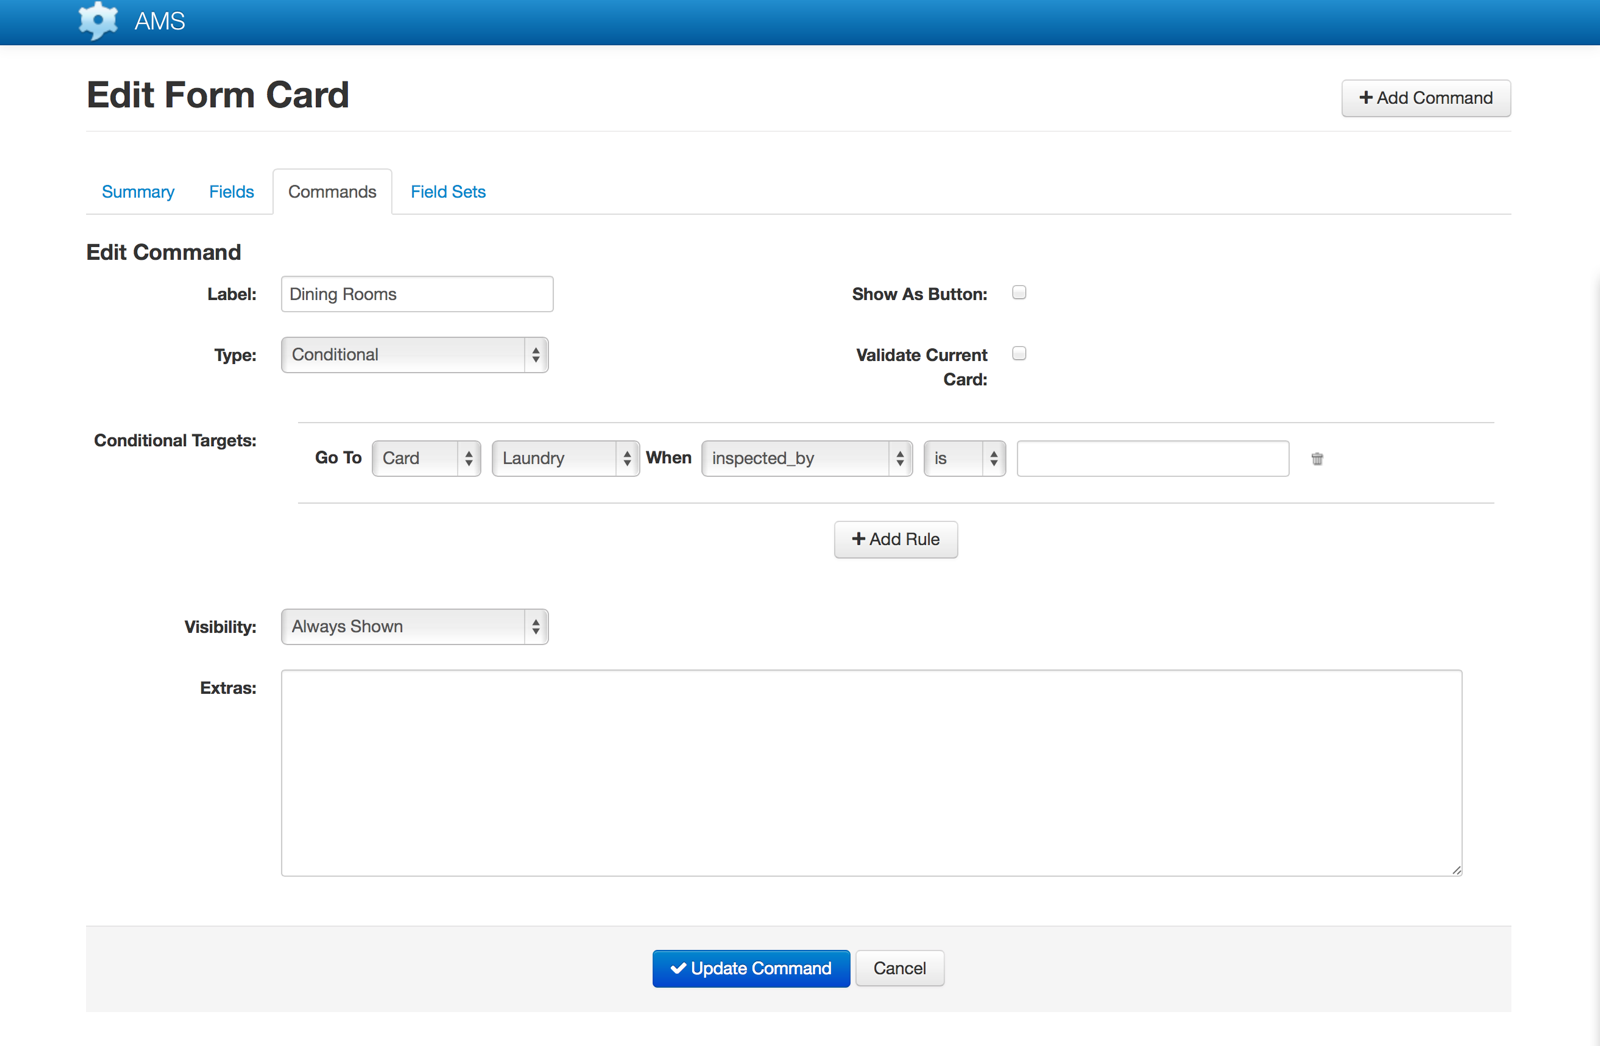
Conditional Link Example - Customer Survey Message
Different questions will need to be answered, depending on who the client is.
Instead of requiring a link command to each client’s questions and the user having to choose the right one, it is possible to set up a single link command with conditionals for each client. This makes it easier for the user as they select the same command on the device each time, and then fill out the questions that appear.
To achieve this, set up a choice group called Client with choices for each possible client. A Link Command is then created by selecting “Conditional” from the command type and clicking the “Add Rule” button. The new rule is then created by selecting “Card” as the target type and then selecting the target card from the list of available cards. The condition is set by choosing the source meta data key or field for the value to compare with (“Client”), the type of comparison to make (“is”) and finally the name of the client.
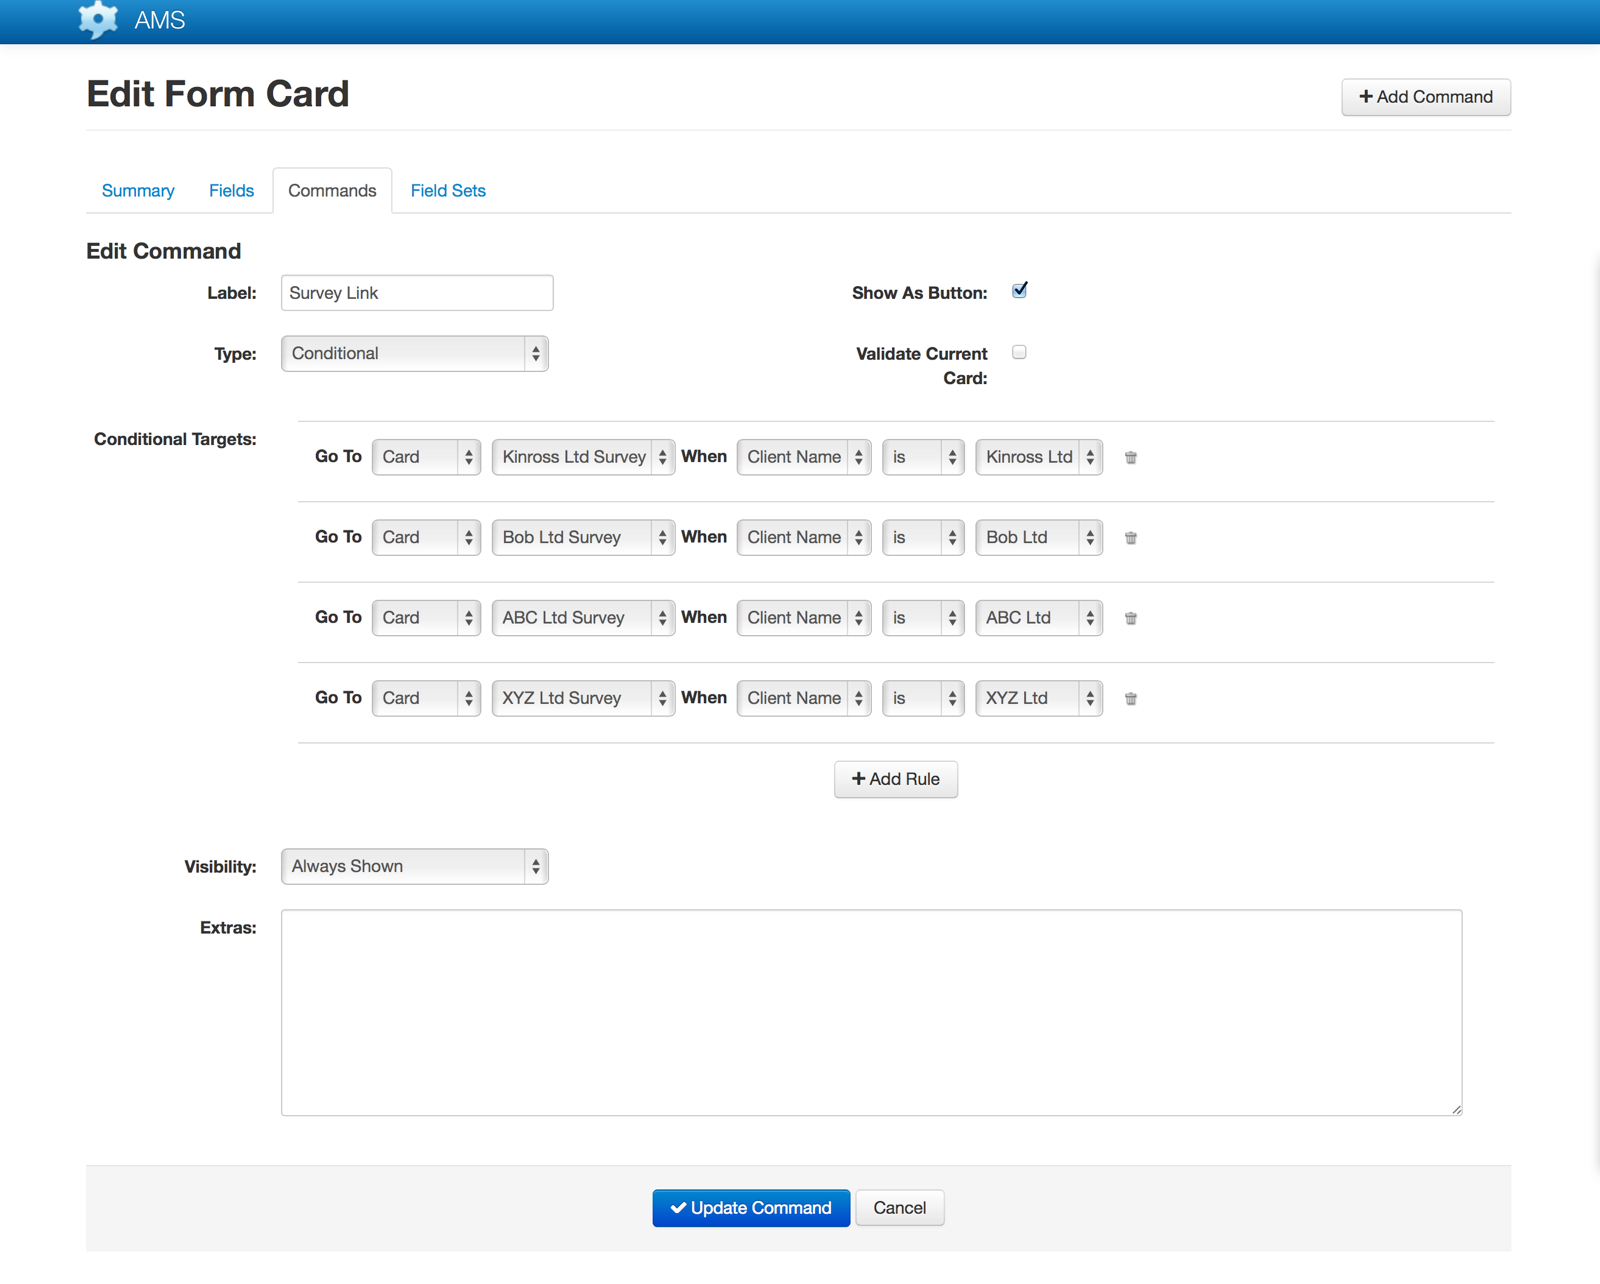
This has the effect of navigating the user to the client’s specific form (card) based on the client they have selected.
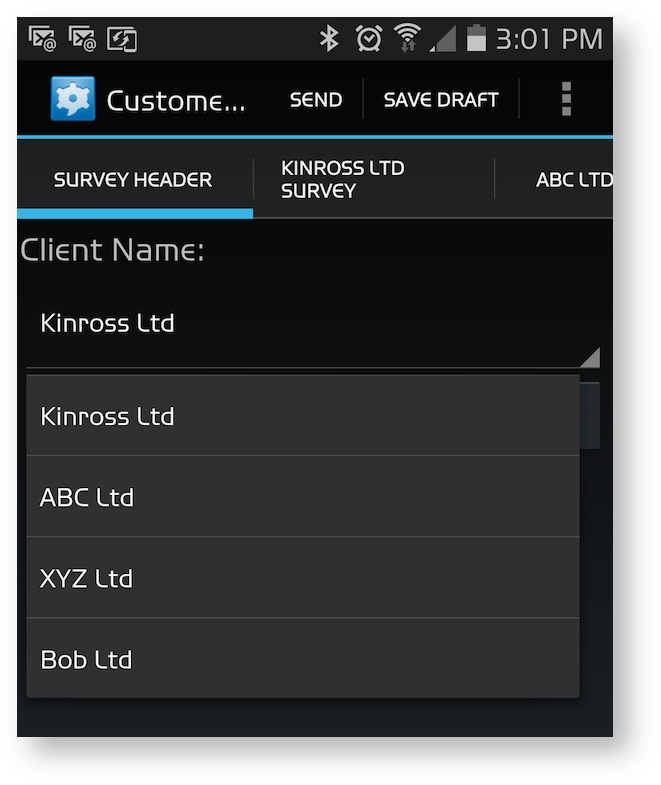
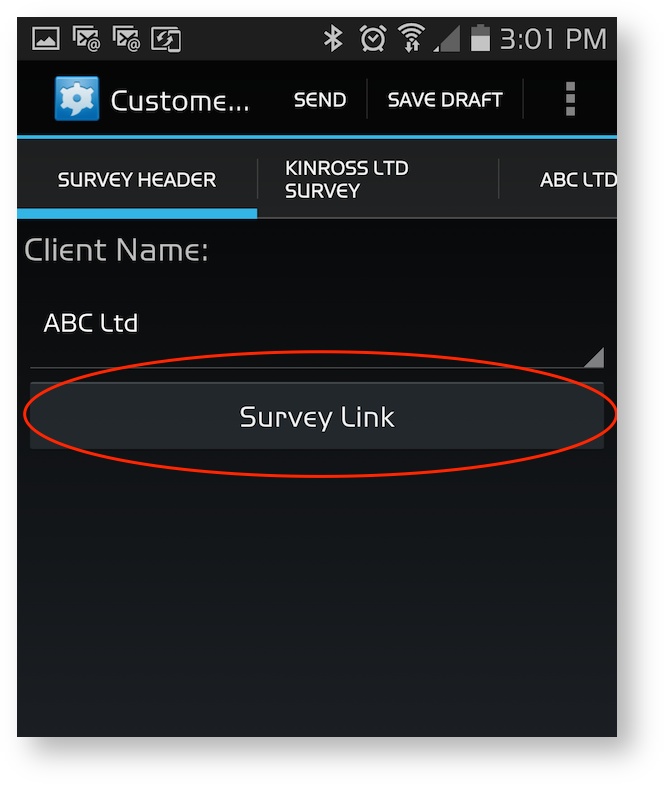
The following screenshots illustrate what this looks like on a device (Samsung Galaxy S5, Android 4.4.2), first selecting the customer from the list (choice group, pop-up) and then clicking the button (“Survey Link”:
Call Command
On devices with phone capability, initiates a phone call using the number stored in the selected meta data field.
Set Value Command
Sets the specified value in the selected meta data field and then sends a copy of the message to the server. The copied message is marked as partial and is intended for notification purposes. Useful for workflows and managing access to the content in the message. For example you can require that a user accept a message before revealing more of the content.
Remote Load Command
Allows you to load data from a 3rd party web service on demand (requires that the device is online). The current message data is sent to the specified URL as a HTTP POST request. The response data is merged into the current message’s data. The response must be in the XML format required for the message. Alternatively you can apply a XSL transformation to alter the XML as required. This can be useful for live data lookups, last inspection at the site, customer data etc.
See Loading Remote Data for more details.
Location Command
Get the device’s current location via GPS (if available) and set the specified meta data field to the captured location. When converted to data or xml the individual location values are available under latitude, longitude etc.
This command will be removed in the future and wil be superceeded by the Action Command. For simple location capture such as getting the location when the user completes and sends a message, just use the ‘Capture Location’ option in the template settings.
